Module SIX – Chapter 10 - DESIGN PROPOSAL AND PAPER MOCK UP FOR FINAL WALL HANGING
I have now a group of four design samples each measuring around 15 per 60 cm from which to start designing for the wall hanging.

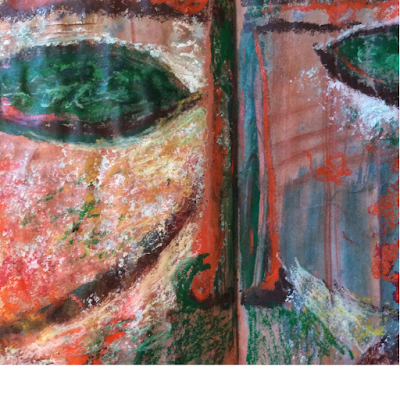
Design 2 from the top appeals to me because of the thin red line down the centre and the wavy movement suggesting depth. In Design 4 from the top I like the fractured and misaligned edges with holes which make me think of shadows of buildings in the water. These holes are repeated also on strips on the vertical plane (perhaps hollow windows reflecting light).
The colours look still too heavy and somber to me and I generally feel that there is too much blue anyway.
I would like to have only a touch of red centrally in the final design and to turn all that blue more towards green.
I thought it might be a good idea at this point to develop a combination of these elements – thin red central line, fluctuating waves, shifting edges, 3D extension on the vertical plane - into a collaged design having the final size of the future wall hanging, approximately A1 size (59,1 per 84,1 cm), but with different proportions, around 168 cm long and 30 cm wide.
Below is a photo of the first stage of designing:
Stage ONE

This collage is double sided because I would like that the wall hanging may be viewed both from the front and the back or in other words that there is no front and back.
I then decided to separate the collage into two halves centrally along its length since I am thinking of the red line as a wound or a fracture with edges.
This is the collage split in two with some space left between the parts:
Stage TWO

In the third and last stage of designing I added elements to the collage and made other decisions:
- “lifting” of some of the waves from the water background to add depth and airiness
- lacing together of the two halves of the wound
- connecting these separate layers by means of branches or roots (depending from the side from which the viewer is placed)
- adding holed strips of paper on a vertical plane.
This are some images of the collage shown both hanging and lying:


Stage THREE
In this collage I developed only one side but the idea is to have a wall hanging with two sides fluctuating in the air, perhaps hanging from one of the short edges.
This is a sketch of how it might look
on a horizontal plane:


and on a vertical plane:
And this a drawing of the collage/wall hanging seen from the side.

At this stage, while waiting for suggestions and inputs from Sian, I need to think of how to realize the different elements and make samples of possible ideas of the:
- water background
- edges of wound
- lifted waves
- branches/roots
- holed structures

This is looking very exciting Daniela - love the colours. Looking forward to seeing it progress,.
ReplyDeleteWonderful work Daniela! It is satisfying both visually and conceptually. I'm looking forward to seeing it develop.
ReplyDeleteI love the ideas you have here, the colours are striking without being garish and the addition of the stitch details is a perfect foil for the rhythmic undulations of the paper. This is looking like a very exciting idea for the finished piece.
ReplyDeleteI look forward to seeing the finished piece. Are you coming to Summer School this year? You could take it with you
ReplyDeletethis is beautiful! talent!!
ReplyDeleteLandscapes